
Overview
Under the Visits tab, you can do three things:
Visits homepage controls
Click image to enlarge.
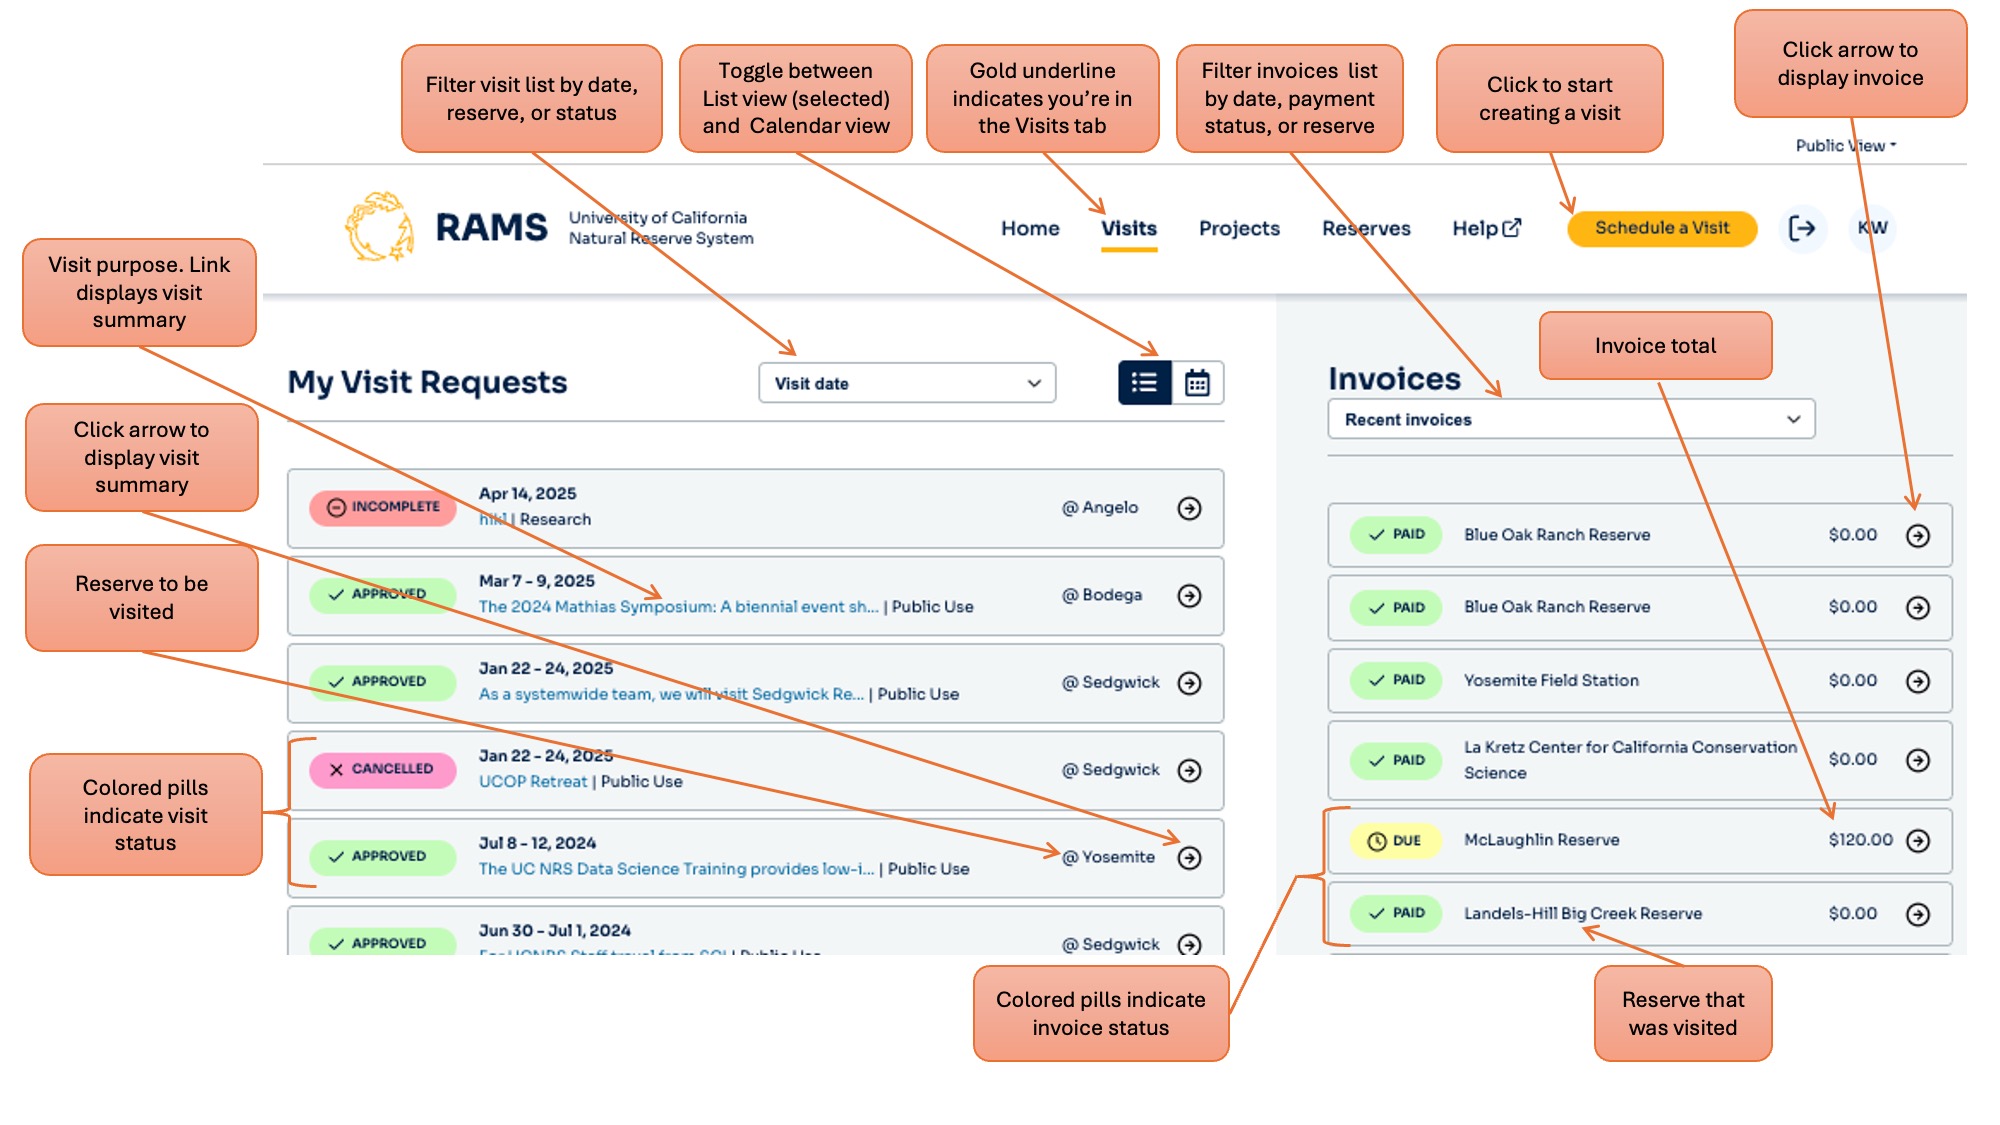
My Visit Requests
View all of your visit requests.
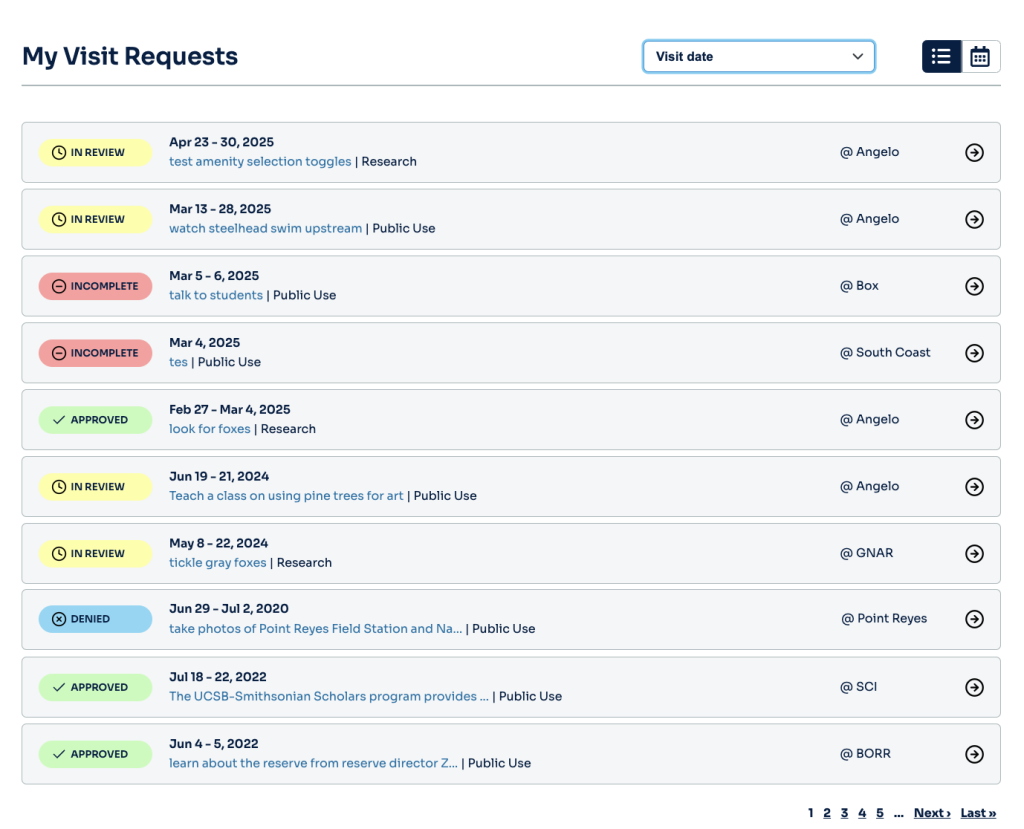
Request status
Request status is color coded. Options:
List controls
Ordering the list
Use the drop-down menu to order the list by:
- Visit date
- Status — Options: Approved, In Review, Denied, Incomplete
- Submit date — date the request was submitted
- Reserve — Options: List of all reserves that use RAMS
View icons
There are two ways to view your visit requests:
- List
- Calendar

List view
Displays visits in a table; the default view. Clicking on a visit name, or its arrow, will open its Visit Summary page.
Calendar view
Displays visits as calendar dates. Clicking on a visit will open its Visit Summary page.
Filter displayed visits with the drop-down menu. Choices are:
- All—Display all visits
- Approved—Display only approved visits
- In Review—Display only visit requests currently under review
- Denied—Display only denied visit requests
- Reserve name—Display only visits to the selected reserve. Only reserves to which visit requests have been submitted will be listed.

Invoices
Lists all of your invoices.

Filter/order invoices
Use the drop-down menu to filter/order the invoices shown. Options are:
- Recent invoices — Order by invoice creation date. Most recently created invoices appear first.
- Paid — Only invoices that have been paid.
- Balance due — Only invoices for which money is owed.
- Reserve — Only invoices for the selected reserve.
Colors
Invoices are color coded:
- Paid: White
- Due: Gold
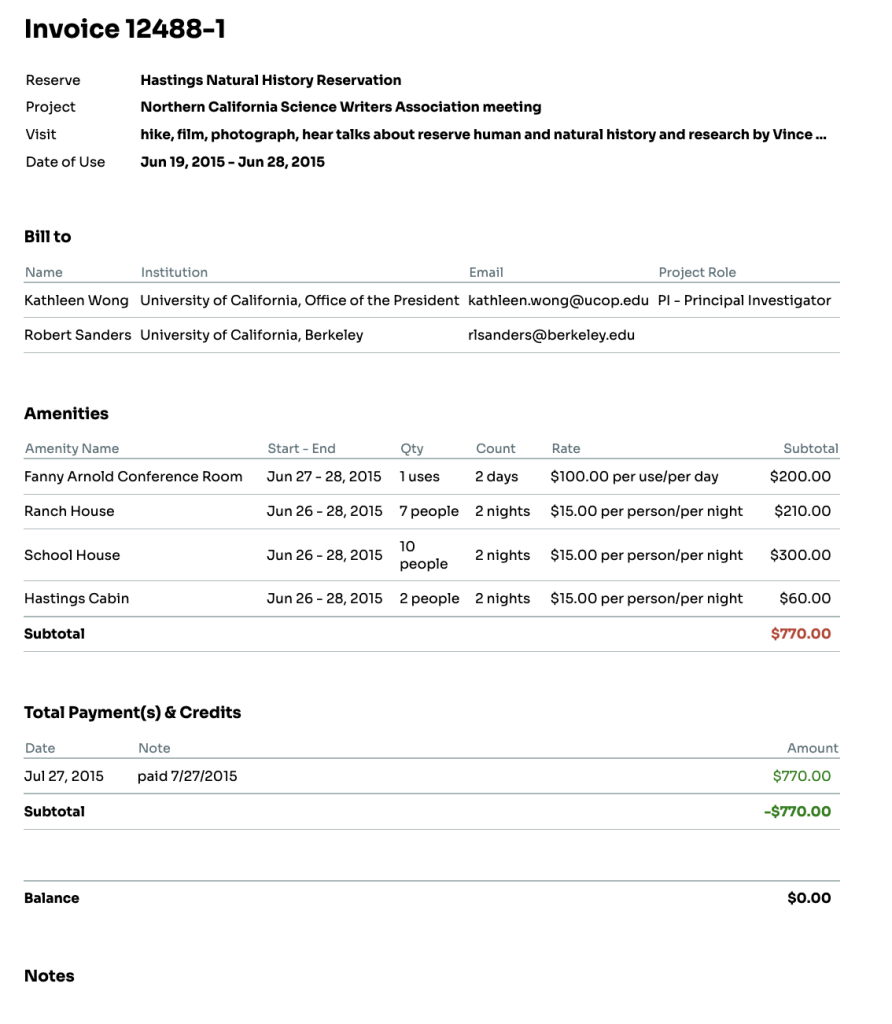
View invoice
To view an invoice, click its arrow.
Schedule a Visit
Here you can submit a request to visit a reserve. During this four-step process, you’ll indicate:
- Dates and times you plan to visit
- What you plan to do during that visit
- Which facilities you’d like to use. Depending on the reserve, facilities can include:
- Housing, such as cabins or camping spaces
- Vehicles, such as trucks or boats
- Space, such as laboratories, classrooms, and offices
All visits must be associated with a particular project, so submit your project first.
To request a visit, either:
- Click the gold Schedule a Visit button at the upper right of most RAMS pages, or
- Go to the homepage by clicking the RAMS logo at the upper left of every page, then click the Schedule a Visit tile.

Schedule a Visit steps
The top of the page shows the four steps required to schedule a visit. The step number you are in is highlighted in yellow and the text is bolded.

Visit Details page
The Visit Details page consists of four sections:
- Select Project
- Purpose of Visit
- Reserves
- Request Amenities
Select Project section
Use the drop-down menu to select the project you want to associate with this visit. All visits must be affiliated with a project. If you haven’t yet submitted a project, click the Create A New Project hyperlink.

Purpose of Visit section
Use the text box to describe your plans for this visit.

Reserves section
Reserve selection drop-down menu
Use the drop-down menu to select the reserve you want to visit.
If you don’t yet know which reserve you’d like to visit, click the Browse Our Reserves hyperlink.
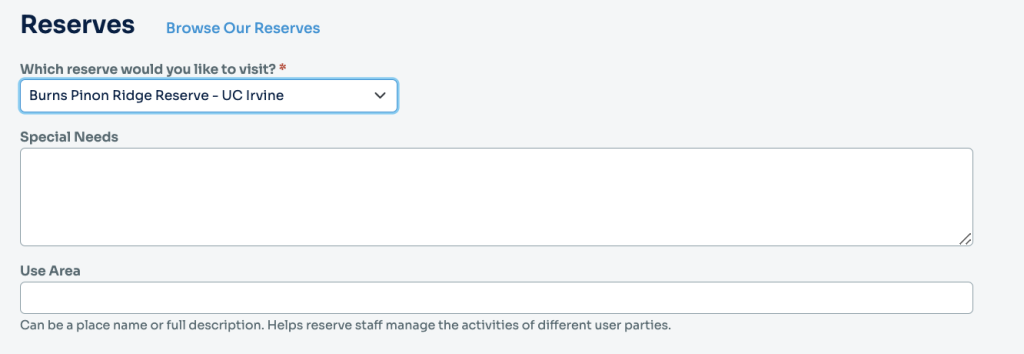
Once you have selected a reserve, the Special Needs and Use Area text boxes appear.
Special Needs text box
Type in any specific or unusual requirements you might have during your visit.
Use Area
Describe or name reserve location(s) where you plan to carry out your activities on this visit. If you don’t know, leave this box blank.
Select Amenities section
If you plan to use reserve amenities such as accommodations, classrooms, vehicles, and/or laboratories, use this section to reserve them. The amenity list displayed depends on the reserve you selected.

To view more details about reserve amenities, click the expand icon(s) at right.
Expand icon
Each amenity and its description will appear pale until you select it.
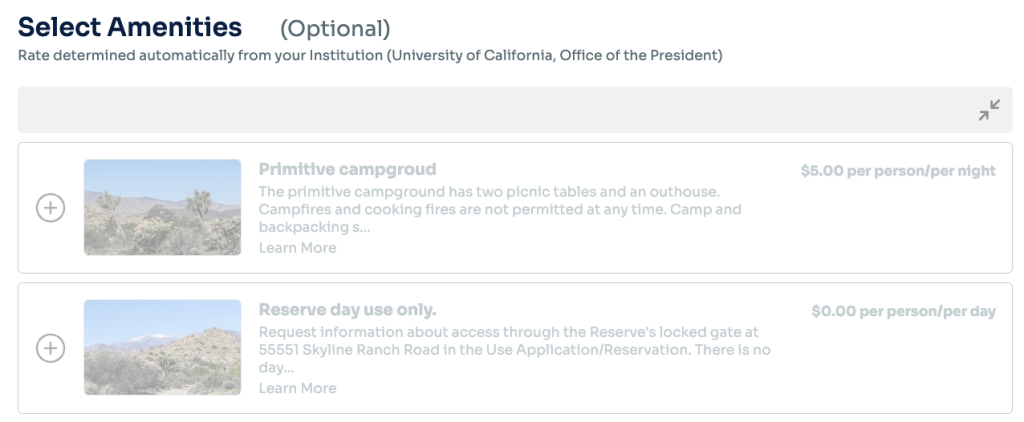
To select an amenity, click the plus icon to the left of the amenity’s photo and description. The amenity will reappear in full color, with a yellow check box to the left of its photo.
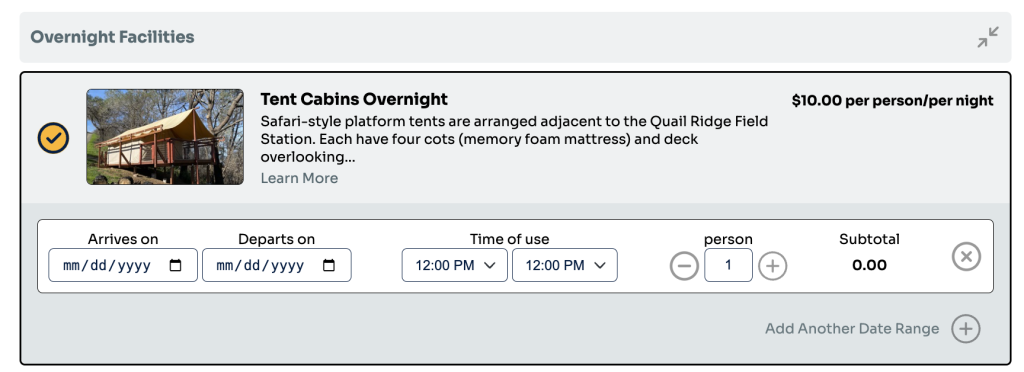
Use the calendar icon to enter the dates you want to reserve the amenity, and the number of people who will use it.
To deselect the amenity, click the x in a circle icon to the right of the Subtotal.
Submit Visit Details
Click the gold Next: Visitors button to submit your Visit Details to move to Step 2: Visitors page.
Visitors page
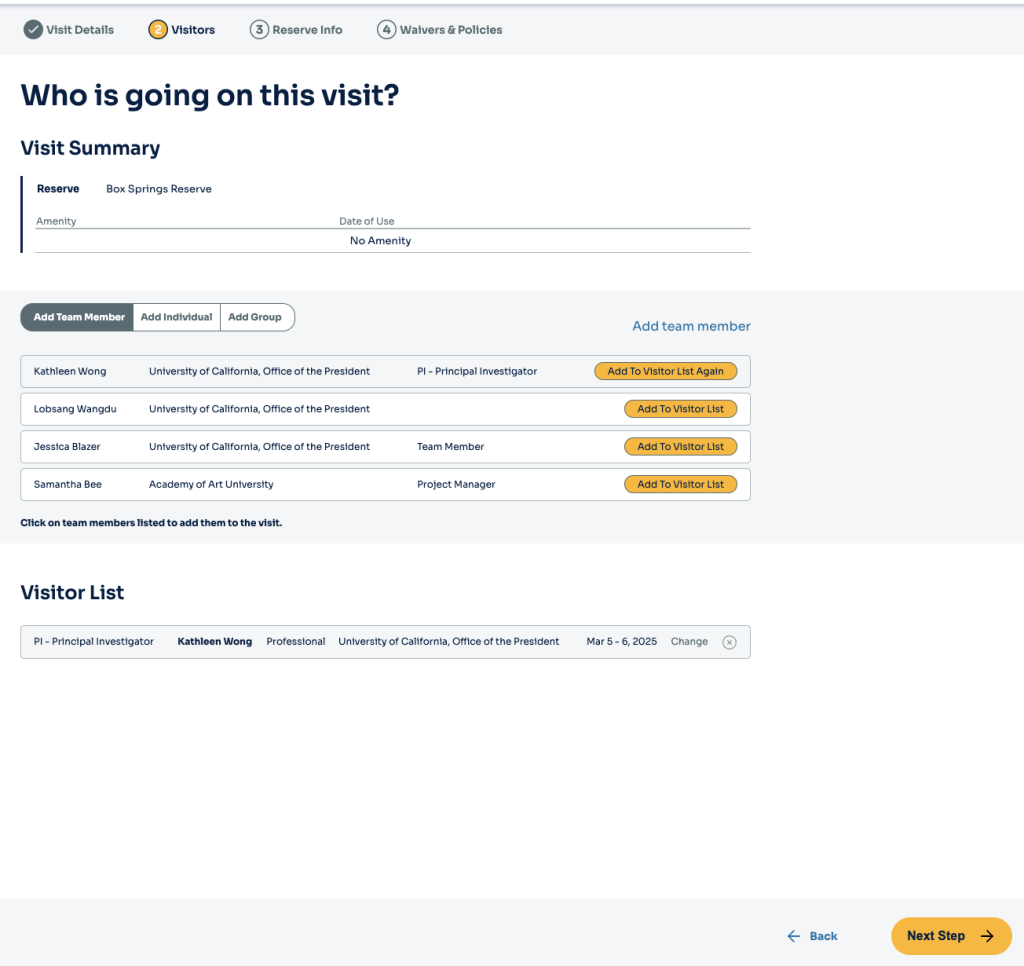
Indicate the people going to the reserve on this visit.
The Visitors page has three sections:
- Visit Summary
- Add Visitors
- Visitor List
Visit Summary section
Lists the information you’ve entered about this visit so far: the name of the reserve, plus any amenity reservations you’ve made.
Add Visitors section
Name the people who will be going to the reserve on this visit. This section has three category buttons:
- Add Team Member—selected by default
- Add Individual
- Add Group
Add Team Member category button
Add listed team members
- Click the person’s gold Add to Visitor List button
- The Change Date Range pop-up window appears. Use this window to select the team member’s role and visit dates
- Click the gold Save button to add this person to the Visitor List below.

Add a person NOT on the list
- Click the Add Team Member link.
- Click the Add New Team Member link. The Visits/Add a Team Member page opens. This page is essentially identical to the Projects/Add a Team Member page.
- Enter the new team member’s name in the Full Name box:
If the person’s name, title, and email appears:
- Select their name.
- Choose their project role from the drop-down menu.
- Click Add Team Member to add their name to the Project Team list.
- Click the BACK to Schedule Visit link at the bottom of the page.
- The person’s name will now be on the team member list.
- Click their gold Add To Visitor List button to add them to the Visitor List below.
If the correct person’s name does NOT appear:
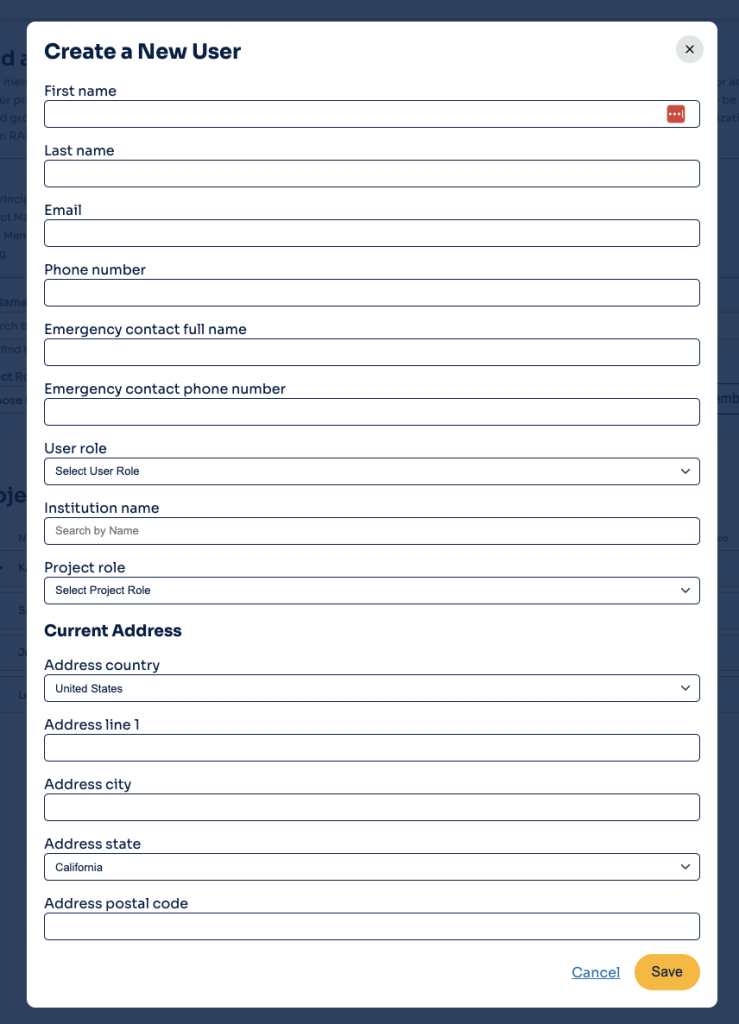
- Click the Create New User link. The Create A New User popup will appear.
- Fill out all required fields.
- Click the gold Save button.
- The person’s name will now appear on the Project Team list.
- Click their gold Add To Visitor List button to add them to the Visitor List below.
Review the Visitor List
- To add more visitors, repeat the Add listed team members and/or Add a person NOT on the list steps.
- When you’ve finished adding all your visitors, click the gold Next Step button to move to Step 3: Reserve Info.

Reserve Info page
Answer any questions on this page. Many questions that appear will depend on the reserve you want to visit and the type of work you plan to do. To continue to Step 4, you must fill in the box asking where you will be storing your data .

Click the the gold Next Step button to move to Step 4: Waivers & Policies.
Waivers & Policies page
The Waivers & Policies page consists of four sections:
- Waivers Information
- Reserve Use Agreement
- Code of Conduct Agreement
- Data Management Agreement
Waivers Information section
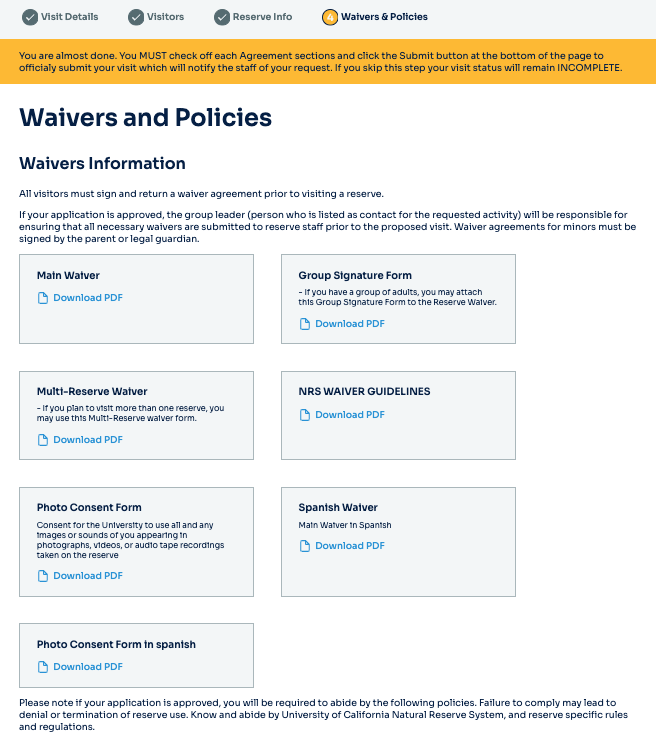
- Download the NRS Waiver Guidelines to determine which waivers you need to sign. Download the appropriate waivers/signature forms
- Download the Photo Consent Form.
- Have everyone who plans to visit sign these forms.
- Email scans of signed copies to the reserve director OR give signed waivers to reserve staff when you visit.
Reserve Use Agreement section
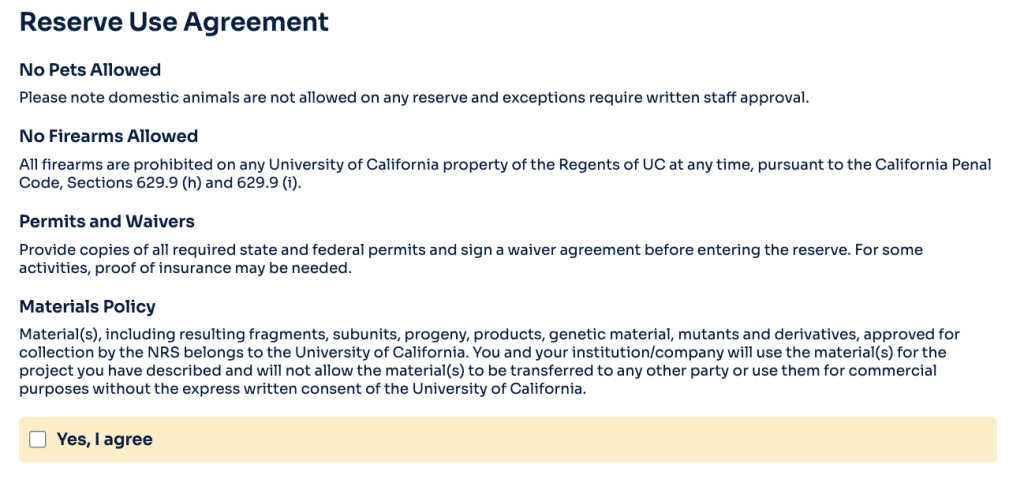
Read the Reserve Use Agreement and click the “Yes, I agree” checkbox.
Code of Conduct Agreement section
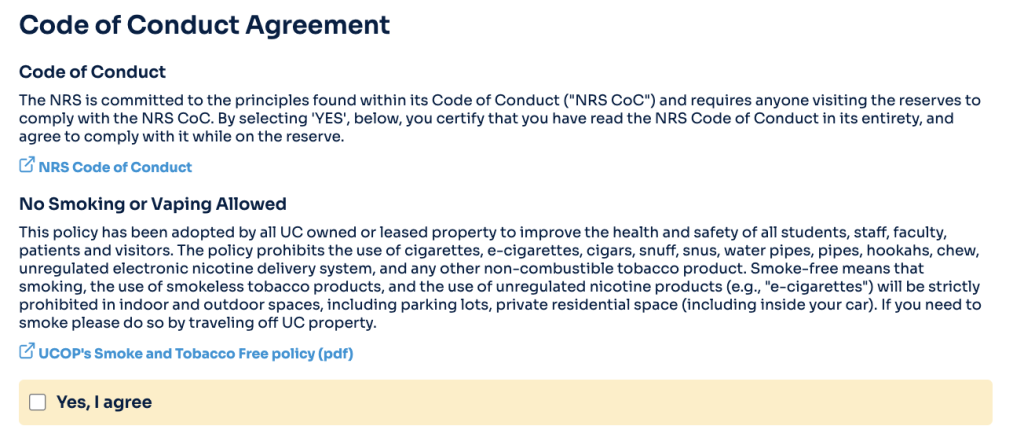
Read the Code of Conduct Agreement and click the “Yes, I agree” checkbox.
Data Management Agreement section
Read the Data Management Agreement and click the “Yes, I agree” checkbox.
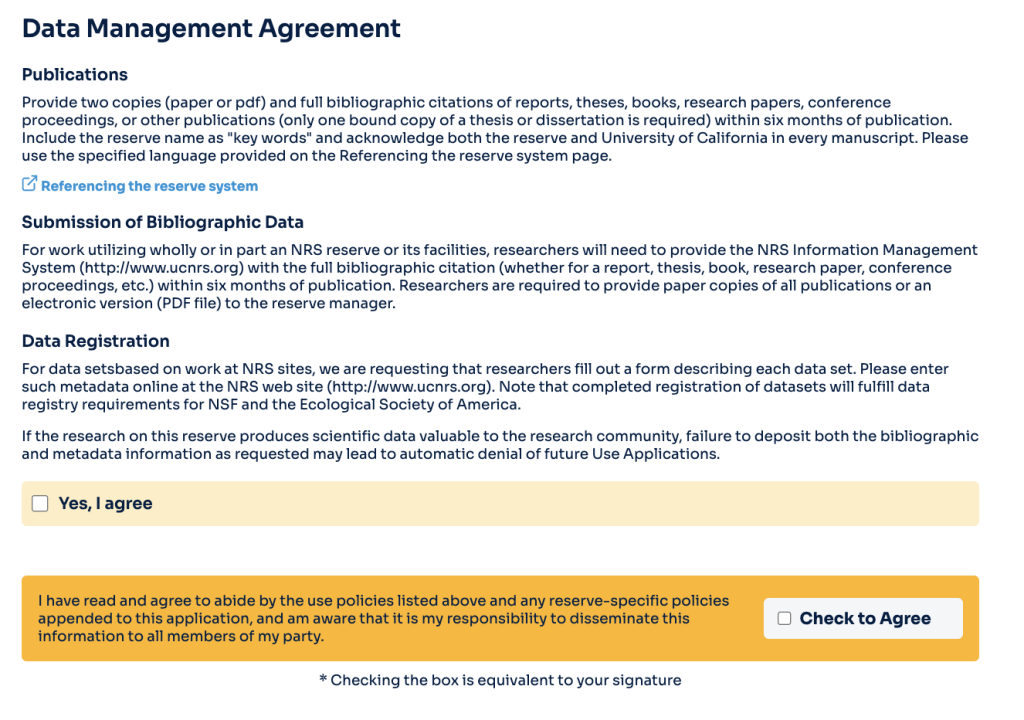
Check to Agree statement
Click the Check to Agree checkbox to indicate you have read and agree to abide by all use policies and will disseminate the information to your party.
Submit button
Click the gold Submit button to send your visit request to reserve staff. This will open the Visit Summary page

Visit Summary
Review your Visit details here.
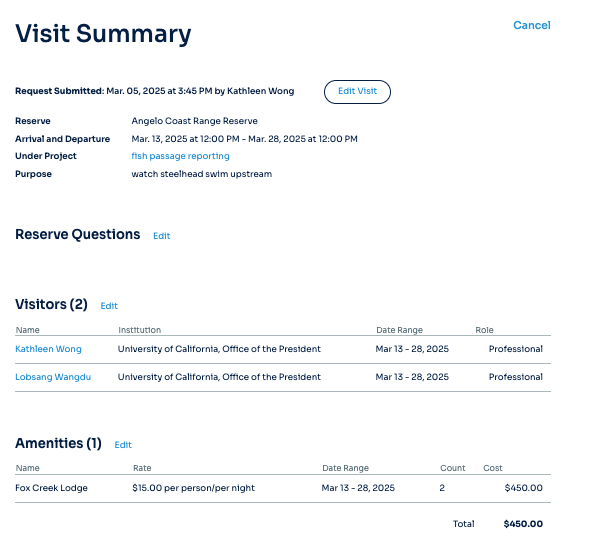
To make changes to this visit request:
- Click the Edit Visit button to return to Step 1: Visit Details; or
- Click the Edit link for each section you wish to modify.
To delete the Visit request, click Cancel.
The project name link takes you to the summary page for that project.
Each team member link opens an email for that person.