
Overview
A project is what you plan to do on a reserve, such as teach a class, conduct research, or hold a meeting. Staff use project information to determine whether your proposed activity is suitable for the site.
Projects homepage controls
Click image to enlarge.

My Projects
Lets you access all projects you have submitted.
Display projects drop-down menu
Filter which projects are displayed based on their status. Options are:
- All Projects—Every project no matter what its status
- Active Projects—Only projects with Project Duration dates that are:
a. Not specified, or
b. Include the current date - Inactive Projects—Only projects with Project Duration dates in the past
- Incomplete Projects—Only projects that have not yet been submitted
View a project
There are two ways to view a project from this page:
- Project title hyperlink
- Right arrow icon
Both actions will take you to the Project Summary page.
Create a New Project button
Clicking the gold Create A New Project button in the right margin takes you to the Create a new project page.

Create a New Project
Getting there
Use one of these two ways to start creating a new project:
- From the Homepage dashboard, click the Create a Project button.
- From anywhere in RAMS, click the Projects tab, and select the gold Create A New Project button on the right-hand side of the page.

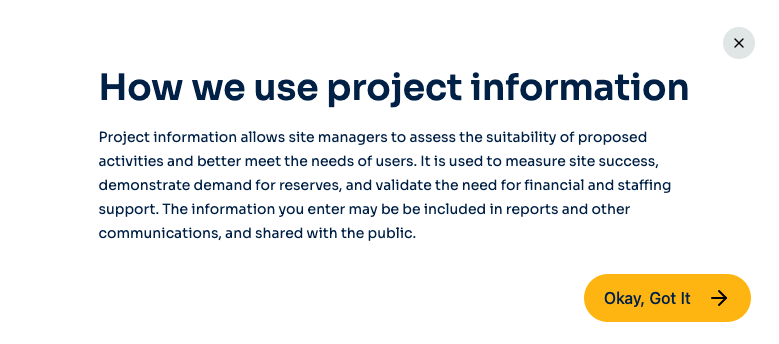
After clicking either of these buttons, the How we use project information pop-up window appears. Read the text, then click the gold Okay, Got It button. This takes you to the Project Details page.
Project steps
The top of the page displays the four steps required to submit a project. The step you are in is highlighted in yellow.

Project Details
The Project Details page has four sections:
- Project Type
- Details
- Methods
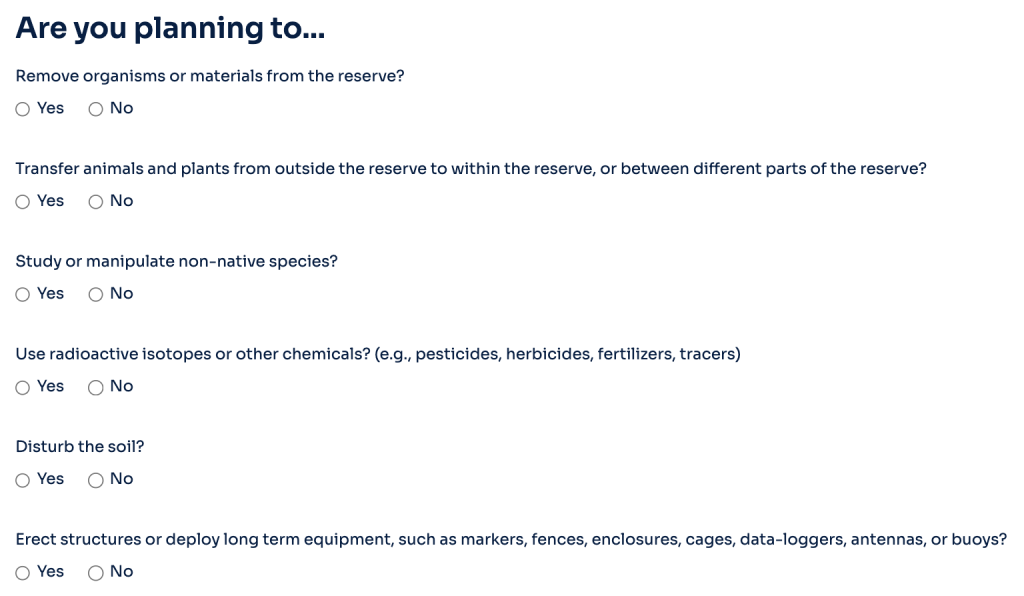
- Are you planning to…
Project Type section
Click the option that best describes your project: Research, University Class, Meeting or Conference, or Public Use

The project type you select will determine the sections that appear below.
Details section
Enter descriptive information about your project, including its title, summary, and the kinds of natural resources your project will involve.

Title
Enter a concise title that describes what your project is about.
Examples
UC Santa Cruz field ecology 101 class
Fall 2025 meeting of Tang Laboratory
Survey of western tanagers
Project Abstract
Summarize the project in a few sentences.
Examples
Survey infection rates of tick-borne diseases in rodent vectors across California.
Host conference of experts on endangered amphibians of the Southwest.
Hold festival celebrating the ecosystem services and value to the community provided by coastal wetlands.
Will your project involve any of the following?
Check boxes if your project involves animals, soils, plants, fungi, species of special concern, or none of the above. Your responses will determine the questions you are asked in Step 3: Permits.
Methods section
Describe any manipulations of the natural environment you plan to perform. These may include sampling or collecting specimens, impacting plants and animals, disturbing or accessing cultural resources, introducing species or genotypes, and erecting equipment affecting the reserve environment or species.

Are you planning to… section
Answer a few more questions about your project plans. Your responses may prompt reserve staff to ask additional questions about your activities.
Submit the information
Click the gold Next: Team button at the bottom of the page to go to Step 2: Team.

Team page
The Team page consists of two sections:
- Add a Team Member
- Project Team list
Add a Team Member section
Identify individuals authorized to edit your project, book project visits, and receive invoices. The instructions indicate the four types of roles (Principal Investigator, Project Manager, Team Member, and Billing) and the permissions each role confers (Edit Project, Book Visit, Receive Invoice).
As a project owner, you are always considered a Principal Investigator.

To add a Team Member, start typing the person’s name into the Full Name text box.
If the new team member’s name, title, and email appear:
- Select their name
- Select their Project Role using the drop-down menu
- Click the Add Team Member button
- Their name will appear on the Project Team list below
If your new team member doesn’t come up:
- Click the Create New User link (under the Full Name text box). The Create a New User pop-up window will appear
- Fill out all fields in the Create a New User window
- Click the gold Save button, which returns you to the Team page
- The new person’s name will appear on the Project Team list
Project Team section
All team members you add, as well as their capabilities, will appear in the Project Team table at the bottom of the page.
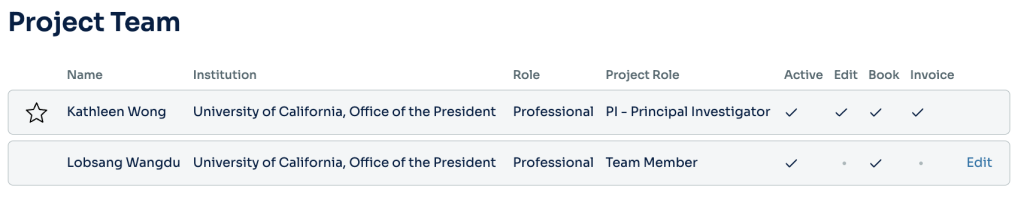
To change a team member’s capabilities, click their Edit hyperlink. The edit team member pop-up window will appear allowing you to remove the team member, edit their user role, and specify what they are authorized to do in RAMS
Edit Team Member pop-up
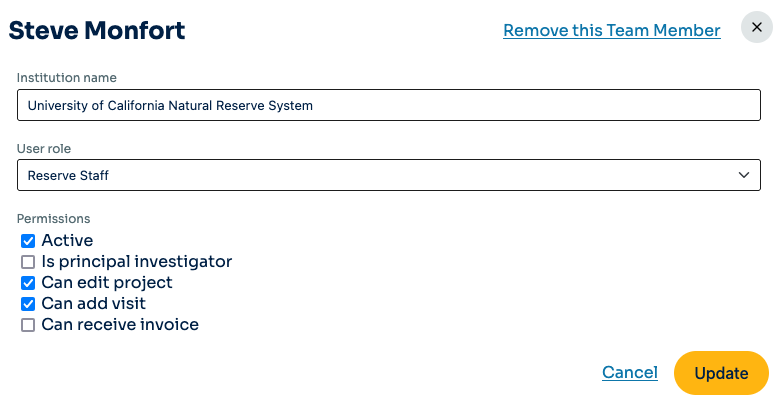
Remove this Team Member hyperlink
Delete the person from the team.
Permissions
A checked box enables role authorizations. Unchecking a box lets you remove authorizations without changing role designations.
Active means the person is currently working on the project.
Update button
Click the gold Update button to save your changes and return to the Team page.
Next: Permits button
When done adding team members, click the gold Next: Permits button at the bottom of the page to go to Step 3: Permits.

Permits page
Your responses to Project Details questions determine what, if any, permit questions are displayed. Reserve users are responsible for obtaining all appropriate and required permits for their projects.
Federal permits
Answer the Yes/No questions about work that may require federal permits.

State permits
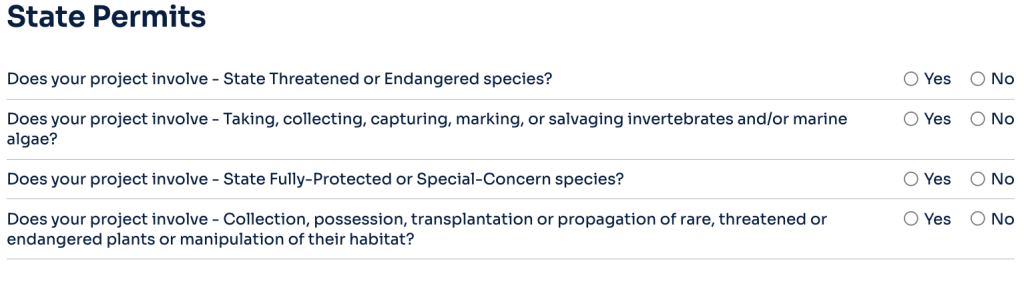
Answer the Yes/No questions about work that may require state permits.
Institution permits
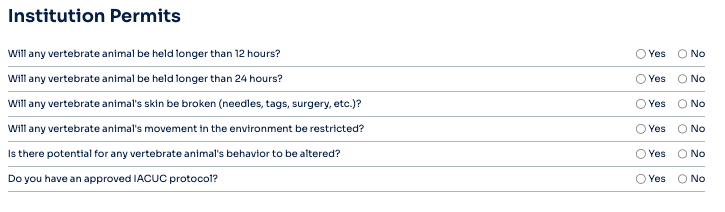
Answer the Yes/No questions about work that may require institution permits.
Approved permits
Enter information about any permits you may have that are relevant to your work. This information can include the permit number, valid dates, the name of the issuing institution for any IACUC (Institutional Animal Care and Use Committee) permits, etc.

Files section
Upload relevant permits or other information requested by a reserve manager.

To upload a file, click the + Upload File button at right.
Next: Funding
Click the gold Next: Funding button to go to Step 4: Funding.

Funding page
The Funding page consists of two sections:
- Add Information About Your Grant
- Project Funding
Add Information About Your Grant section
If you have grant funding for your project, add information about each grant one at a time. Repeat the process for every project funding source.

Official Grant Title
Type in the title of the grant.
Funding Agency
Funding agency options are:
- National Science Foundation (NSF)
- National Institute of Health (NIH)
- U.S. Geological Survey (USGS)
- U.S. Forest Service (USFS)
- U.S. Department of Agriculture (USDA)
- California Department of Fish and Wildlife (CDFW)
- Other
Select Other if your funding agency is not listed in the drop-down menu.

Funding Opportunity Number
Only applicable to federal grants. The only special characters used in FONs should be dashes (-).
Grant Number or Grant URL Address
Enter as applicable.
Principal Investigators
Type the names of all Principal Investigators on your grant.
Co-Principal Investigators
Type the names of all Co-Principal Investigators on your grant.
Award Amount
Grant amount in U.S. dollars.
Start Date and End Date
Click the calendar icons to enter the start and end dates of the grant.
Add Funding Information button
Click the Add Funding Information button to add the information you have just entered to the Project Funding section below.
Project Funding section
The Project Funding section lists all grants entered for this project.

Save Project & Submit button
Once you have added all project funding information, click the gold Save Project & Submit button to go to the Project Summary page.

Reserves page
Reserve names
Click the box next to the reserve(s) you wish to visit for this project.
Save Project & Submit button
Click the gold Save Project & Submit button to notify each reserve about your project.
These notification emails enable staff to initiate communications about project details with potential users before a visit request is submitted. For example, staff might want to discuss topics such as whether a species or feature is found at a reserve, the appropriateness of the work proposed, or considerations about equipment or conditions.
Project Summary page
Lets you review and edit all the information you entered about your project. Reaching this page indicates that you have successfully submitted your project.
The Project Summary page sections correspond with the four steps to submit a project:
- Project Details summary
- Project Team summary
- Funding summary
- Permits summary
In addition, there is a Visits summary section.
Project Details section
Information in this section was entered in Step 1: Project Details
The sections displayed depend on responses to Are you planning to… questions.
To edit information in this section, click the Edit Project Details hyperlink. This takes you to the Edit Project Details page. The contents of this page are essentially identical to the Project Details page.

Project Team summary section
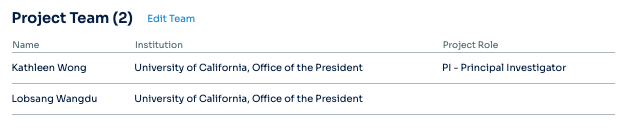
The number of people on the project team is listed in parentheses.
To edit this information, click the Edit Team hyperlink. This takes you to the Edit Team page. The contents of this page are essentially identical to the Team page.
Funding summary section
The number of funding sources entered is listed in parentheses.
To edit information in this section, click the Edit Funding hyperlink. This takes you to the Edit Funding page. The contents of this page are essentially identical to the Funding page.

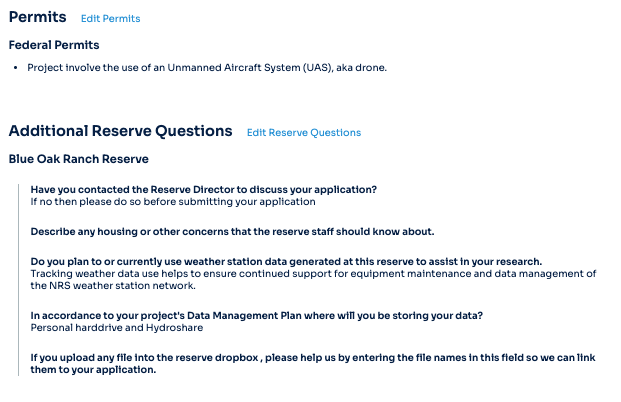
Permits summary section
To edit information in this section, click the Edit Permits hyperlink. This takes you to the Edit Permits page. The contents of this page are essentially identical to the Permits page.
Visits summary section
The number of visits scheduled for this project are listed in parentheses.
To arrange a new visit, click the Schedule a Visit hyperlink. This takes you to the Visit Details page.
To view details about a particular visit, click its right arrow icon. This takes you to the Visit Summary page.

Schedule a Visit message
Once satisfied with your project details, you can schedule a visit to a reserve. Read the Next Steps message in the left margin before proceeding.
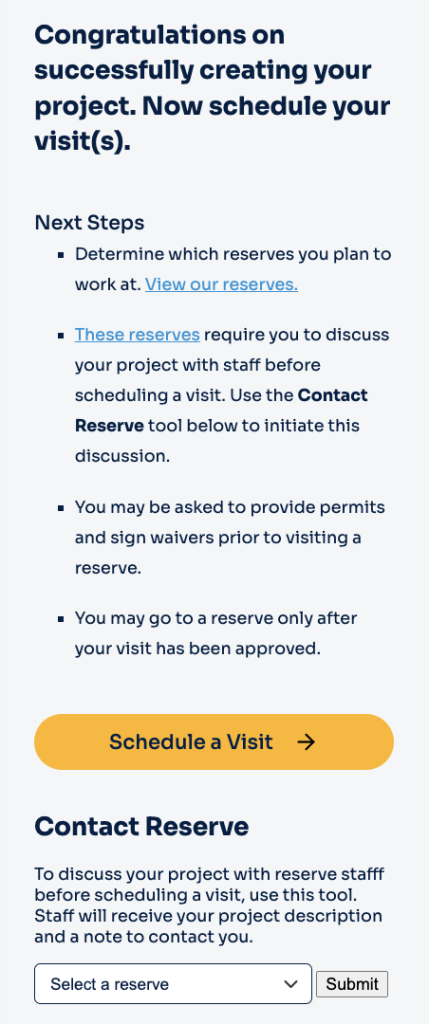
There are several ways to start scheduling a visit:
- click the gold Schedule a Visit button in the left margin
- click the Schedule a Visit hyperlink in the Visits summary section of this page
- click the Home tab to go to the dashboard, then click the Schedule a Visit box
- click the RAMS icon to go to the dashboard, then click the Schedule a Visit box
Incomplete message
If after you click on a project you see the Incomplete message in the left margin, you have not yet submitted it for review. You either:
- stopped entering information about your project before the end of the process, or
- forgot to click the Submit a Project button.

To submit this project, click the Edit Project button. This takes you to the Create A New Project section. All project information you previously entered should have been saved. Advance through the four steps of the process by click the gold Next buttons at the bottom of each screen. After completing Step 4: Funding, click the gold Next: Save Project & Submit button to submit your project.